

In iOS 17 Apple introduced a new transaction trigger for use in Personal Automation, part of their Shortcuts app. This can be used today to build up a CSV file of Apple Pay transactions (NFC only, not from a web browser), ready to import into Account Tracker.
The following steps assume you are familiar with shortcuts, actions and variables documented here: https://support.apple.com/en-gb/guide/shortcuts/welcome/ios.
Getting Started
Run the Shortcuts app (from Apple), select automation and then add a new automation.
Scroll down or search for Transaction and select it. Select the cards you want to automate, leave all the categories checked, don’t filter on Merchants and select Run immediately. Leave notify when run de-selected and tap Next. Choose New Blank Automation.
So far so good. We now need to add a bunch of actions (up to 14 in total).
Date, Card and Merchant (4-5 actions)
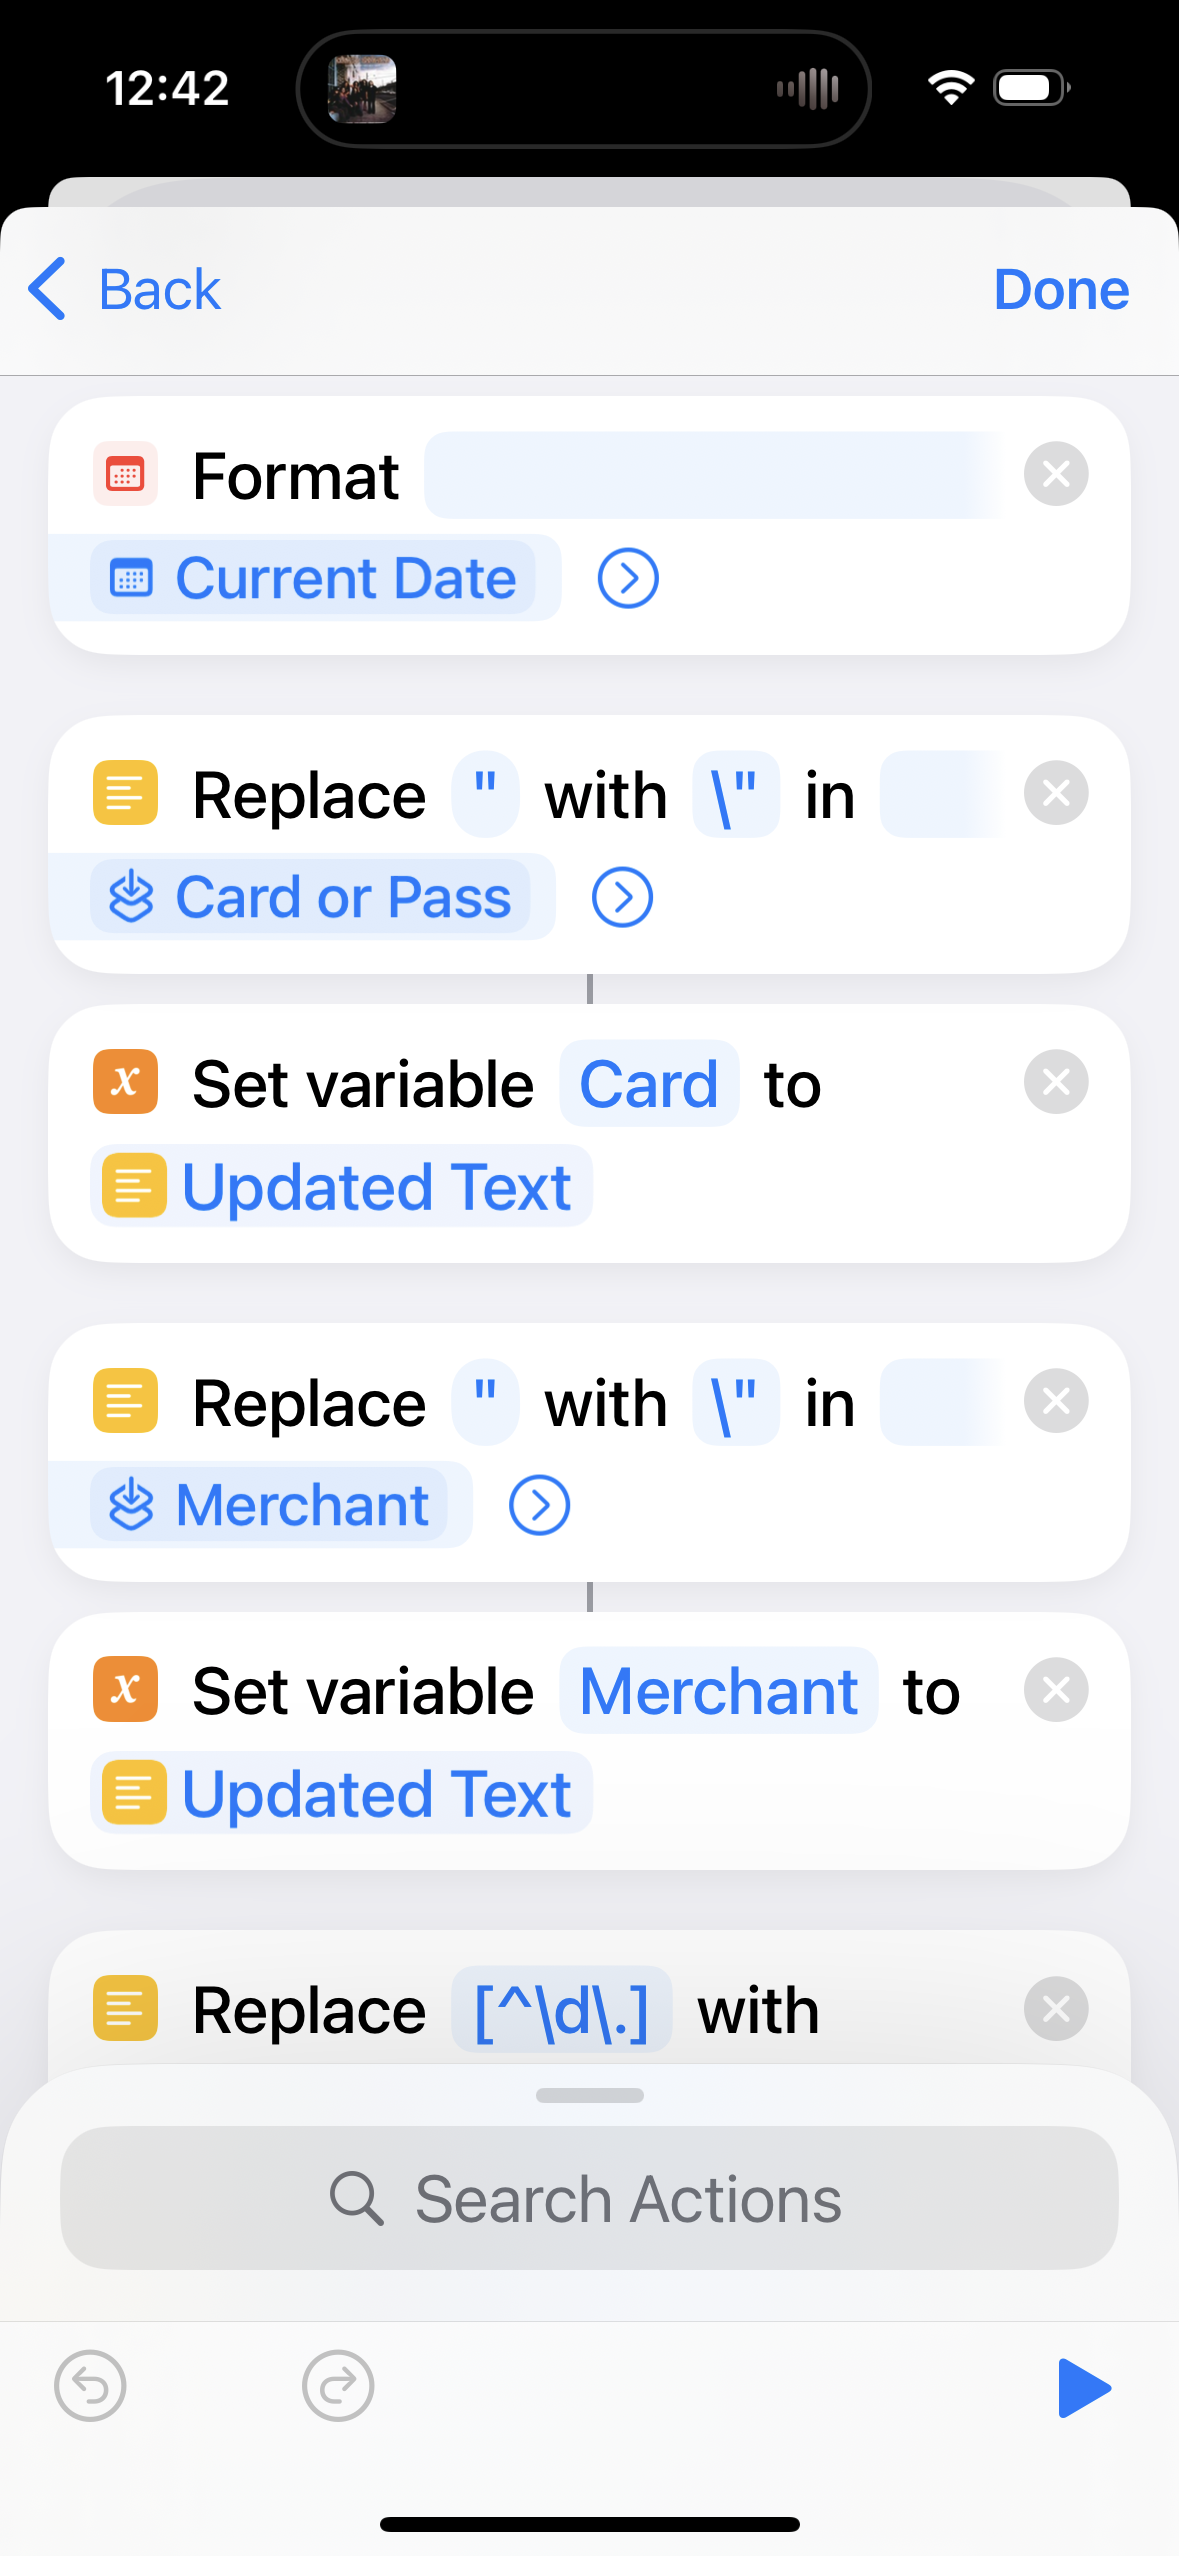
In the search actions box type format and choose Format Date. Tap the Date box, scroll along the Select Variable row and choose Current Date. Set Date Format to Custom and set the format string to dd/MM/yyyy HH:mm:ss (note the capitalisation is very important). This action creates a (magic) variable called Formatted Date that we will use later.
Next we will grab the card (i.e. account name) and merchant (details/payee field). Since these are arbitrary text strings we need to “escape” any “ characters. Add a Replace Text action. Set the first box to “ and the second to \”. Change the variable to Shortcut Input then select it again and change it to Card or Pass (this double selection takes a bit of getting used to).
Now add a Set Variable action and set variable Card to the (magic) variable Updated Text. Note if you only have one card, you can skip the replace text and simply set Card to your account name.
Repeat these two steps for the Merchant field, setting variable Merchant to the (magic) variable Updated Text.
Amount (7 actions)
Handling the amount is more complicated as it isn’t a number! We first need to strip all none digits or decimal separators.
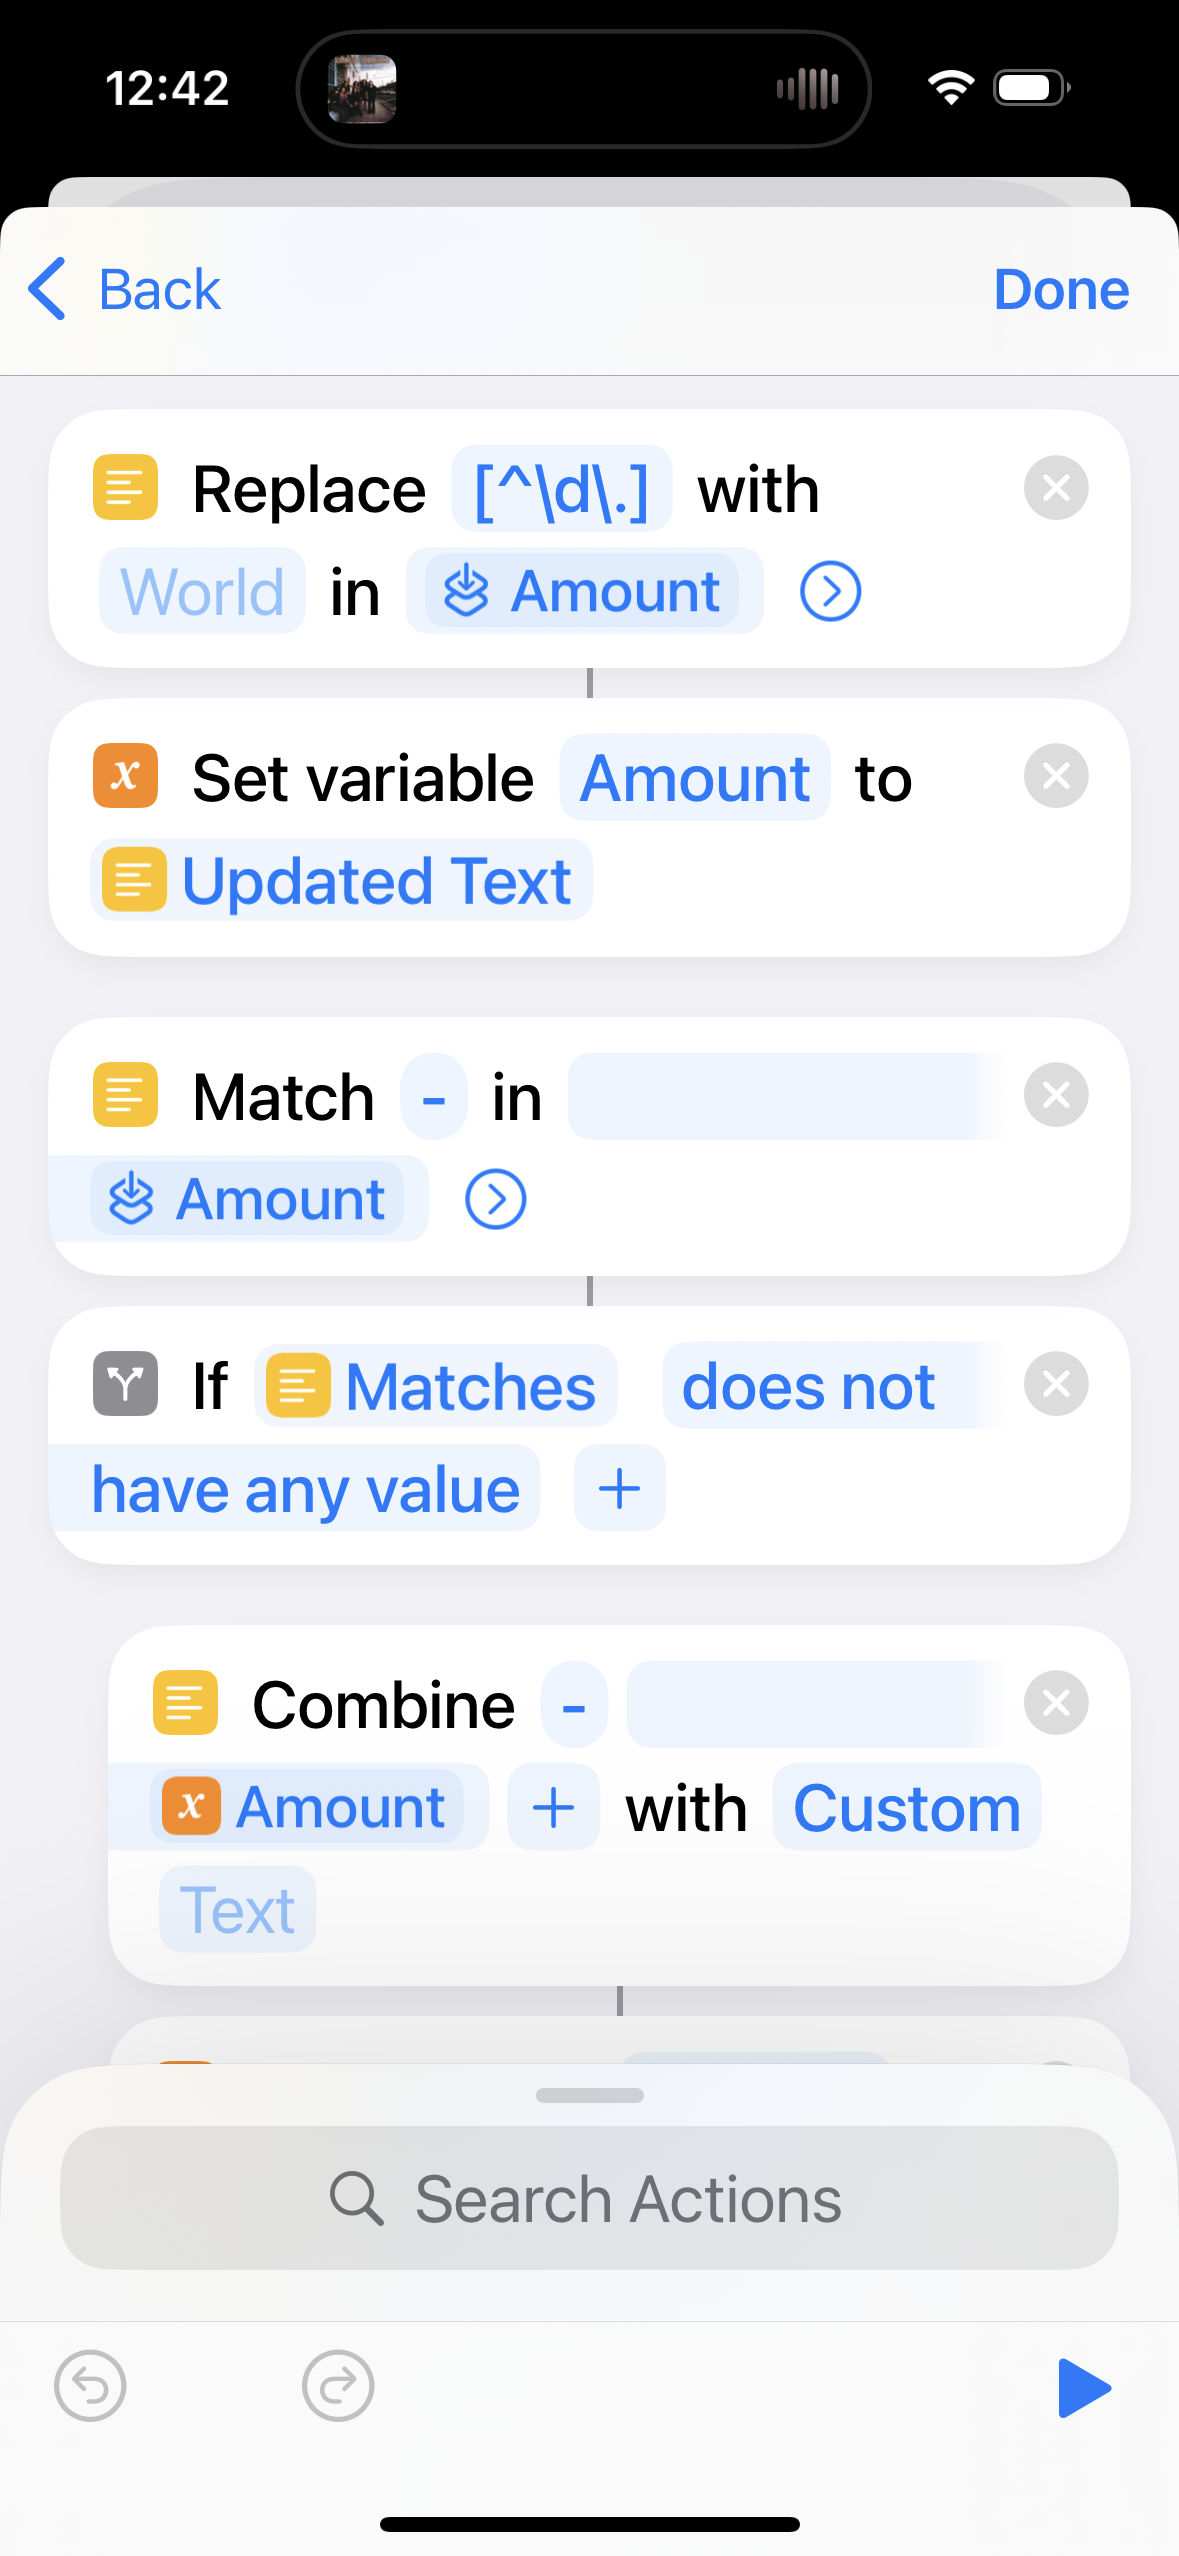
Add a Replace Text action, set the first box to [^\d\.] (or [^\d\,] if your region uses a comma as a decimal separator) and leave the second box empty. Change the variable to Shortcut Input then Amount (note double selection). Tap the right arrow and set Regular Expression to on.
Now set variable Amount to the (magic) variable Updated Text.
Since my app requires a negative for spending and positive for refunds, this is the opposite to what we are given. Only if the original is NOT negative do we need to add a negative (-) prefix. To do this, add a Match Text action, set the first box to – and change the variable to Shortcut Input then Amount (double selection).
Next add an if action setting the first box to the (magic) variable Matches then does not have any value. You can delete the Otherwise action as it is not needed.
To make the amount negative, add a Combine Text action, setting the first box to – and the second to the Amount variable. Set with to Custom and leave the last box empty.
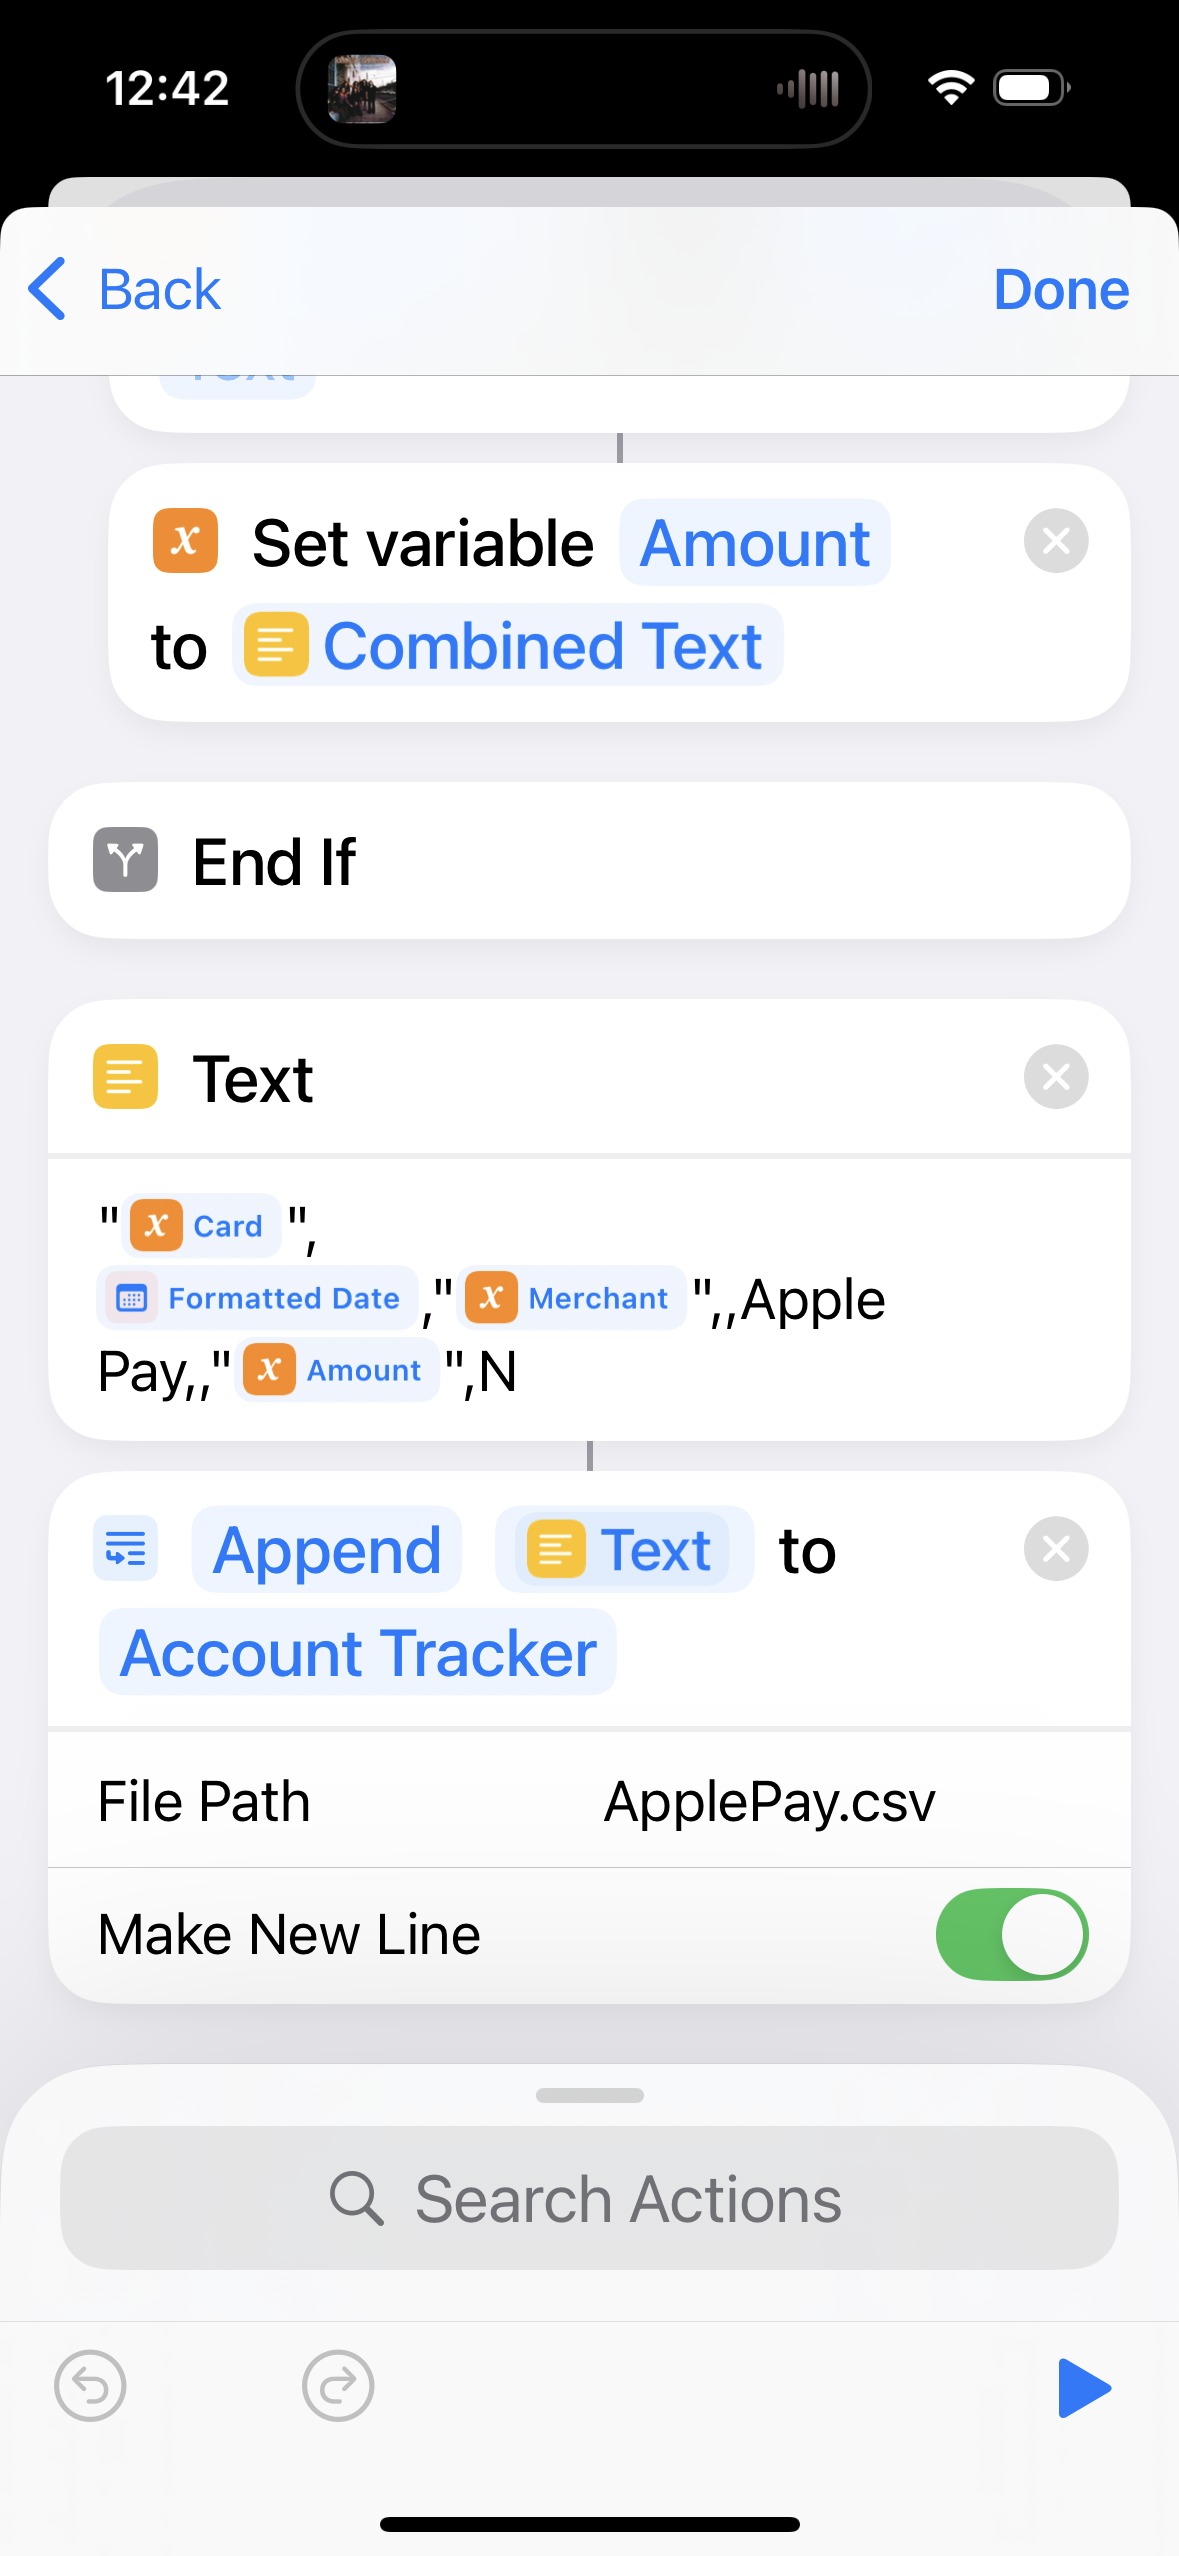
Now set variable Amount to the (magic) variable Combined Text. These two actions need to be dragged to between the if and end if actions.
Save Transaction to CSV File (2 actions)
The final two actions are building a text string to import then appending this to a file. Add a Text action and set it to
“Card”,Formatted Date,”Merchant”,,,,”Amount”,N
replacing Card, Formatted Date, Merchant and Amount with their actual variables. The card, merchant and amount need to be double quoted. You can optionally set the notes (5th column) to Apple Pay.
To append to a CSV file, add the Append to text file action, setting the first field to the (magic) variable Text and for the second browse to a folder (I use the Account Tracker folder in iCloud Drive). Set the File Path to be a filename (e.g. applePayTransactions.csv) and set Make New Line to on.
Testing
That’s basically it. You can test some of it by tapping the play automation (play) button at the bottom right. This won’t have actual transaction details but if you scroll down (or view your CSV file) it should output something like
“”,18/11/2024 17:23:00,””,,,,”-“,N
You can only properly test it by buying things and it took me about 8 purchases to get things working properly! If your automation doesn’t work, please double check with the above first!
Final thoughts
Once working I recommend importing periodically, once you have a number of transactions. After importing make sure you delete the CSV file to avoid duplicate transactions.
If anyone uses this with a refund I would be curious to know if the amount comes through as negative.
Also any suggestions or improvements welcome!
